
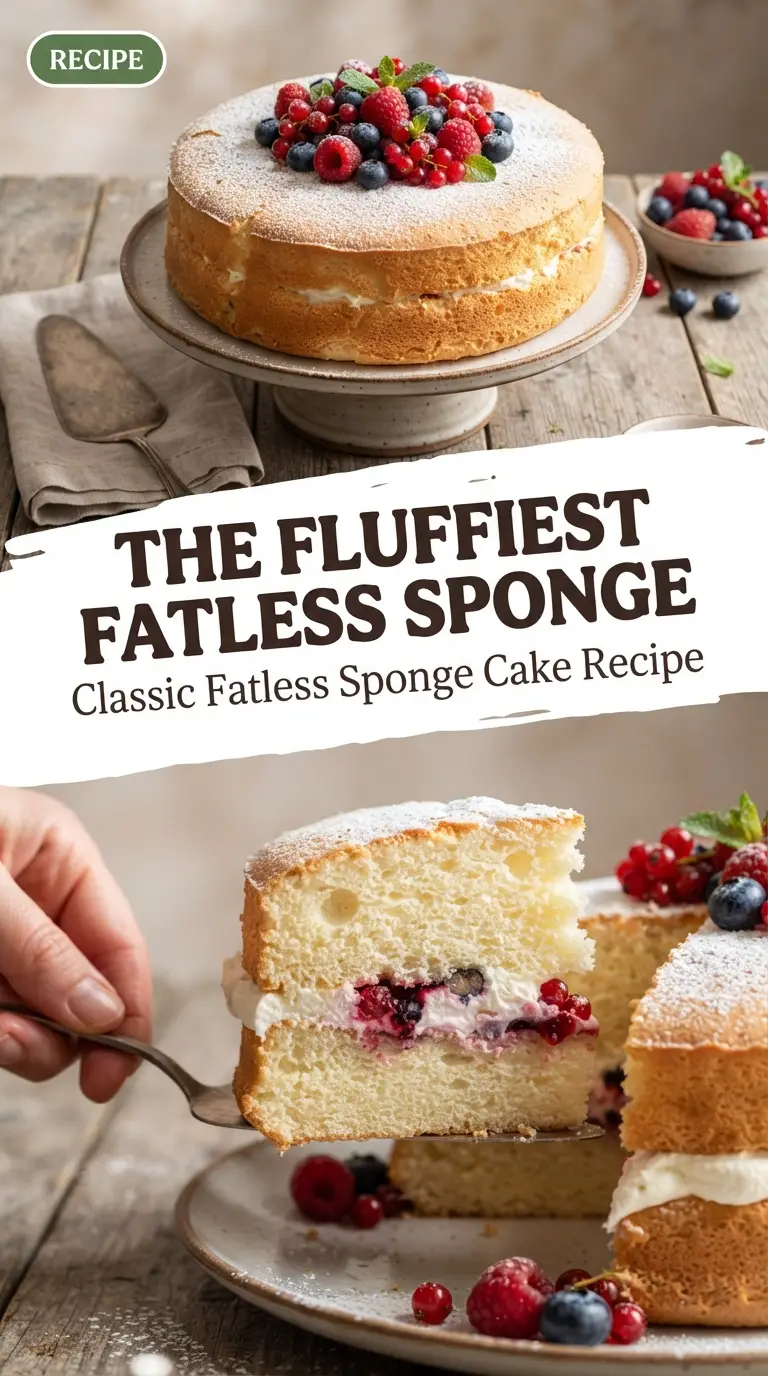
This fatless sponge recipe uses three eggs, caster sugar and plain flour, with no butter or oil in the batter. The only lift comes from air you whisk into the eggs, so the crumb is light and springy. It makes two thin layers that you can sandwich with jam and cream, or cut up for a trifle.
You’ll also see this cake called a whisked sponge or a fat free sponge. The method is simple: warm the eggs and sugar over a pan of water, whisk until thick, then fold in the flour. Below I’ve added a tin size table, a comparison of the sugar and flour ratios used online, and fixes for the usual failures.
Jump to the recipe card at the end of this page for exact quantities and a printable version.
What’s in It
The batter is three large eggs, caster sugar and plain flour. That is all. You need a little butter or oil to grease the tins, baking parchment, and jam and whipped double cream if you want to fill it. For equipment you need a large heatproof bowl, a saucepan for it to sit over, an electric hand whisk, a sieve, a large metal spoon and two 18cm sandwich tins.
Fatless, Whisked or Genoise? The Names Explained
Fatless sponge, fat free sponge and whisked sponge all mean the same thing here: no butter or oil in the batter. A Genoise is a close cousin that folds in a little melted butter at the end, so it is richer. A Victoria sponge creams butter and sugar first, so it is a different cake. This is a standard whisked sponge, not one chef’s recipe, and I haven’t tied it to any cookbook.
How I Make It
- Heat the oven. Set the oven to 200°C (180°C fan, gas mark 6) and put a shelf in the middle. Thin layers suit a hot oven because the foam sets before the air has time to escape.
- Prepare the tins. Brush two 18cm sandwich tins lightly with butter or oil and line the bases with baking parchment. Dust the sides with a little flour and tap out the extra. The batter has no fat of its own, so the parchment does a lot of the work of helping it release.
- Warm the eggs and sugar. Half fill a saucepan with water and bring it to a gentle simmer, then turn the heat right down. Put the eggs and sugar in a large heatproof bowl and set it over the pan, with the base clear of the water. Whisk until the sugar has dissolved and the mixture feels warm, not hot. Rub a little between your finger and thumb. If it feels gritty, keep going. Warm eggs are runnier, so they trap air more easily.
- Whisk to ribbon stage. Take the bowl off the heat and keep whisking on high speed until the mixture is pale, very thick and has about tripled in volume. It should also have cooled down. Lift the whisk and draw a figure of eight on the surface. If the line stays visible for a few seconds, you’re there. This takes several minutes, so go by how it looks, not the clock.
- Fold in the flour. Sift half the flour over the surface. With a large metal spoon, cut down through the middle, sweep along the base and turn the mixture over, turning the bowl as you go. Sift over the rest and repeat. Stop as soon as you can’t see dry flour. Every stir pushes out air, so be gentle and quick.
- Fill the tins. Divide the batter between the tins. For even layers, weigh each filled tin on the scales and move a little batter across until they match. Tilt the tins to bring the batter to the edges. Don’t spread it with a knife.
- Bake for 12 to 15 minutes. Keep the door shut for the first 10 minutes. The sponges are ready when they are pale golden, spring back when you press the top lightly, and the edges just start to shrink from the tin.
- Leave the tins for 2 minutes, run a thin knife around the edges, then turn each sponge out onto a wire rack and peel off the paper. Flip each one back so the top faces up, which stops it sticking to the rack. Cool completely, about 30 minutes, before you fill it.
- Whip 150ml double cream to soft peaks. Spread jam on one layer, cover with the cream, then add the second layer. Dust with icing sugar if you like.
The Tin Size Nobody Mentions
Online recipes use three eggs in 18cm tins, 20cm tins or even one tin, and few say what that does to the layers. I worked this out from tin area (pi × radius × radius). Two 18cm tins have about 509 cm² of base. Two 20cm tins have about 628 cm². That is 23% more area, so the same batter makes layers about 19% thinner. Here is how I’d adjust.
The times in that table are my estimates from the thickness maths, not bake test results. One flour brand’s recipe uses three eggs and a bit more flour in two 20cm tins and bakes them for 10 to 12 minutes, which fits the thin layer reasoning.
The Sugar and Flour Ratio Nobody Explains
Fatless sponge recipes differ a lot in how much sugar and flour they use. I divided the amounts in several versions I found by the number of eggs, so you can compare them.
Most whole egg versions sit at 25 to 28g of each per egg. The Good Food member recipe has nearly twice as much sugar as flour (170g against 91g with the cornflour) and adds baking powder. My reading is that a batter that sugar heavy needs the extra lift, so it is a different cake from a true whisked sponge. If you want to cut sugar, know that it makes up nearly a quarter of this batter by weight (75g of about 324g, using 58g of egg each). It also helps the egg foam hold, so cutting it risks a flatter cake.
The Fat Nobody Counts
Fatless means no added fat in the batter. The yolks still carry some. Working from typical nutrition data, I get about 16g of fat from three large eggs, which is roughly 2g per slice when you cut 8. The filling changes things. A typical double cream label says about 48g of fat per 100g, so 150ml adds roughly 70g, or about 9g per slice. In a cream filled slice, the cream has far more fat than the sponge does. That’s my arithmetic, so treat it as an estimate.
Why Bake Times Online Disagree
I found bake times from 10 to 22 minutes for what looks like the same cake. The reasons are tin size, how much batter goes in, oven temperature, and whether the eggs are whisked whole or separated. One wholemeal version with two 20cm tins bakes for 10 to 12 minutes. A separated egg version at 180°C takes about 22. A recipe from the Irish food safety body safefood bakes at 200°C for about 20. For this recipe, use my 12 to 15 minute window as a starting point and trust the cues: pale golden, springy, and the edges just shrinking.
Common Mistakes and How I Fixed Them
- It sank or came out flat. The eggs weren’t whisked enough, the flour was folded too hard, or the batter sat before baking. Whisk until a figure of eight holds for a few seconds, fold with fewer strokes, and bake straight away.
- It’s tough or rubbery. The flour was overmixed. Use a large metal spoon and stop when no dry flour shows.
- It has brown speckles or a crunchy crust. Some sugar didn’t dissolve. Keep whisking over the heat until the mixture feels smooth between your fingers.
- It’s dry. It was overbaked. Check at 12 minutes and take it out as soon as it springs back.
- It tastes eggy. This is an egg heavy cake. Add 1/2 tsp vanilla extract with the eggs, or the grated zest of a lemon.
- It stuck to the tin. The base wasn’t lined. Always use baking parchment, then run a knife around the edge before turning out.
- I got scrambled bits. The bowl touched the water or the water was boiling. Keep it to a bare simmer with the bowl clear of the water.
Variations
- Whisk 1/2 tsp vanilla extract in with the eggs and sugar.
- Add the finely grated zest of 1 lemon before whisking. Fill with lemon curd and cream.
- Swap 15g of the flour for 15g of cocoa powder and sift them together twice.
- Gluten free. A gluten free plain flour blend can work, but results vary by brand, so test it before a special occasion.
What to Serve With It
Raspberry or strawberry jam with whipped cream is the classic filling. Fresh berries on the side work well too. The sponge is thin and soaks up liquid quickly, so it also makes a good trifle base. Cut it into chunks and add a light splash of juice or sherry rather than a heavy soak. It goes with a pot of tea.
Make Ahead, Storing and Freezing
Store unfilled layers in an airtight container at room temperature for up to 2 days. With no butter to hold moisture, they are best on the day you bake them. Fill the cake on the day you serve it. Once filled with cream, keep it in the fridge and eat it within 2 days. To freeze, wrap each cooled layer in cling film, put them in a freezer bag, and freeze for up to 1 month. Thaw them in their wrapping at room temperature.
FAQs
Can I use self-raising flour?
Yes, some published versions do. This recipe uses plain flour because the lift comes from air alone. The method stays the same if you swap.
Do I have to whisk over hot water?
No, you can whisk cold, but it takes longer. Warming the eggs helps the sugar dissolve and the foam build faster.
Can I make it without an electric whisk?
You can, but it takes a long time. One safefood recipe whisks for 10 minutes over hot water and 5 minutes off the heat. A hand whisk will take at least that long.
How many does it serve?
Cut into 8 slices, it serves 8. Cut into 6 for larger slices.
Can I bake it in one tin?
Three eggs in one 18cm tin make a layer twice as deep as each one here, and it may stay raw in the middle. I’d keep to two tins.
What’s the difference between a fatless sponge and a Victoria sponge?
A Victoria sponge creams butter and sugar, then adds eggs and flour. A fatless sponge has no butter or oil and relies on whisked eggs.
Why did my fatless sponge sink?
Usually the eggs weren’t whisked enough, the flour was folded too hard, or the batter waited too long before baking.
Can I freeze it?
Yes. Wrap each unfilled layer well and freeze for up to 1 month.
One Last Thing
A fatless sponge is quick to bake, but it pays to take your time at the ribbon stage and fold gently. If you use a different tin size, use the table above and check early. Eat it fresh.

Fatless Sponge Recipe
Ingredients
Equipment
Method
- Heat oven. Set the oven to 200°C (180°C fan, gas mark 6) with a shelf in the middle.
- Prepare tins. Grease two 18cm sandwich tins, line the bases with parchment and dust the sides with flour.
- Warm eggs. Put the eggs and sugar in a heatproof bowl over a pan of barely simmering water, base clear of the water. Whisk until the sugar dissolves and the mixture feels warm.
- Whisk thick. Take the bowl off the heat and whisk on high until pale, very thick, cooled and about tripled in volume. A figure of eight should stay visible for a few seconds.
- Fold flour. Sift over half the flour and fold with a large metal spoon, cutting down and turning. Add the rest and fold until no dry flour shows.
- Fill tins. Divide the batter between the tins, weighing them to match. Tilt to level. Do not spread with a knife.
- Bake sponges. Bake for 12 to 15 minutes, until pale golden, springy and just shrinking from the edges.
- Cool layers. Leave 2 minutes, run a knife round the edges, turn out onto a rack, peel off the paper and flip top side up. Cool for 30 minutes.
- Fill cake. Spread jam on one layer, top with the cream, add the second layer and dust with icing sugar.
Notes
- Fan oven: 200°C conventional is 180°C fan or gas mark 6.
- Tin size: for two 20cm tins use 4 eggs, 100 g caster sugar and 100 g plain flour, and check the sponges at 12 minutes.
- Timing cues: start checking at 12 minutes. Ready when pale golden, springy and the edges just shrink from the tin.
- Storing: unfilled layers keep in an airtight container for up to 2 days. Freeze wrapped layers for up to 1 month. Keep a cream filled cake in the fridge and eat within 2 days.
- Key tip: whisk until a figure of eight stays visible for a few seconds, then fold with a metal spoon and stop as soon as no dry flour shows.
- Fatless means no added fat in the batter. The tins are lightly greased, and the yolks carry some fat.
Did You Try This Fatless Sponge Recipe?
I’d love to hear how your sponge cake turned out! Was it beautifully light and fluffy, or did you add a delicious filling to make it your own?
If you enjoyed this recipe, please leave a 5-star rating and share your experience in the comments below! Your feedback helps other home bakers create their perfect sponge cake, too.
Happy baking!

Leave a Reply